
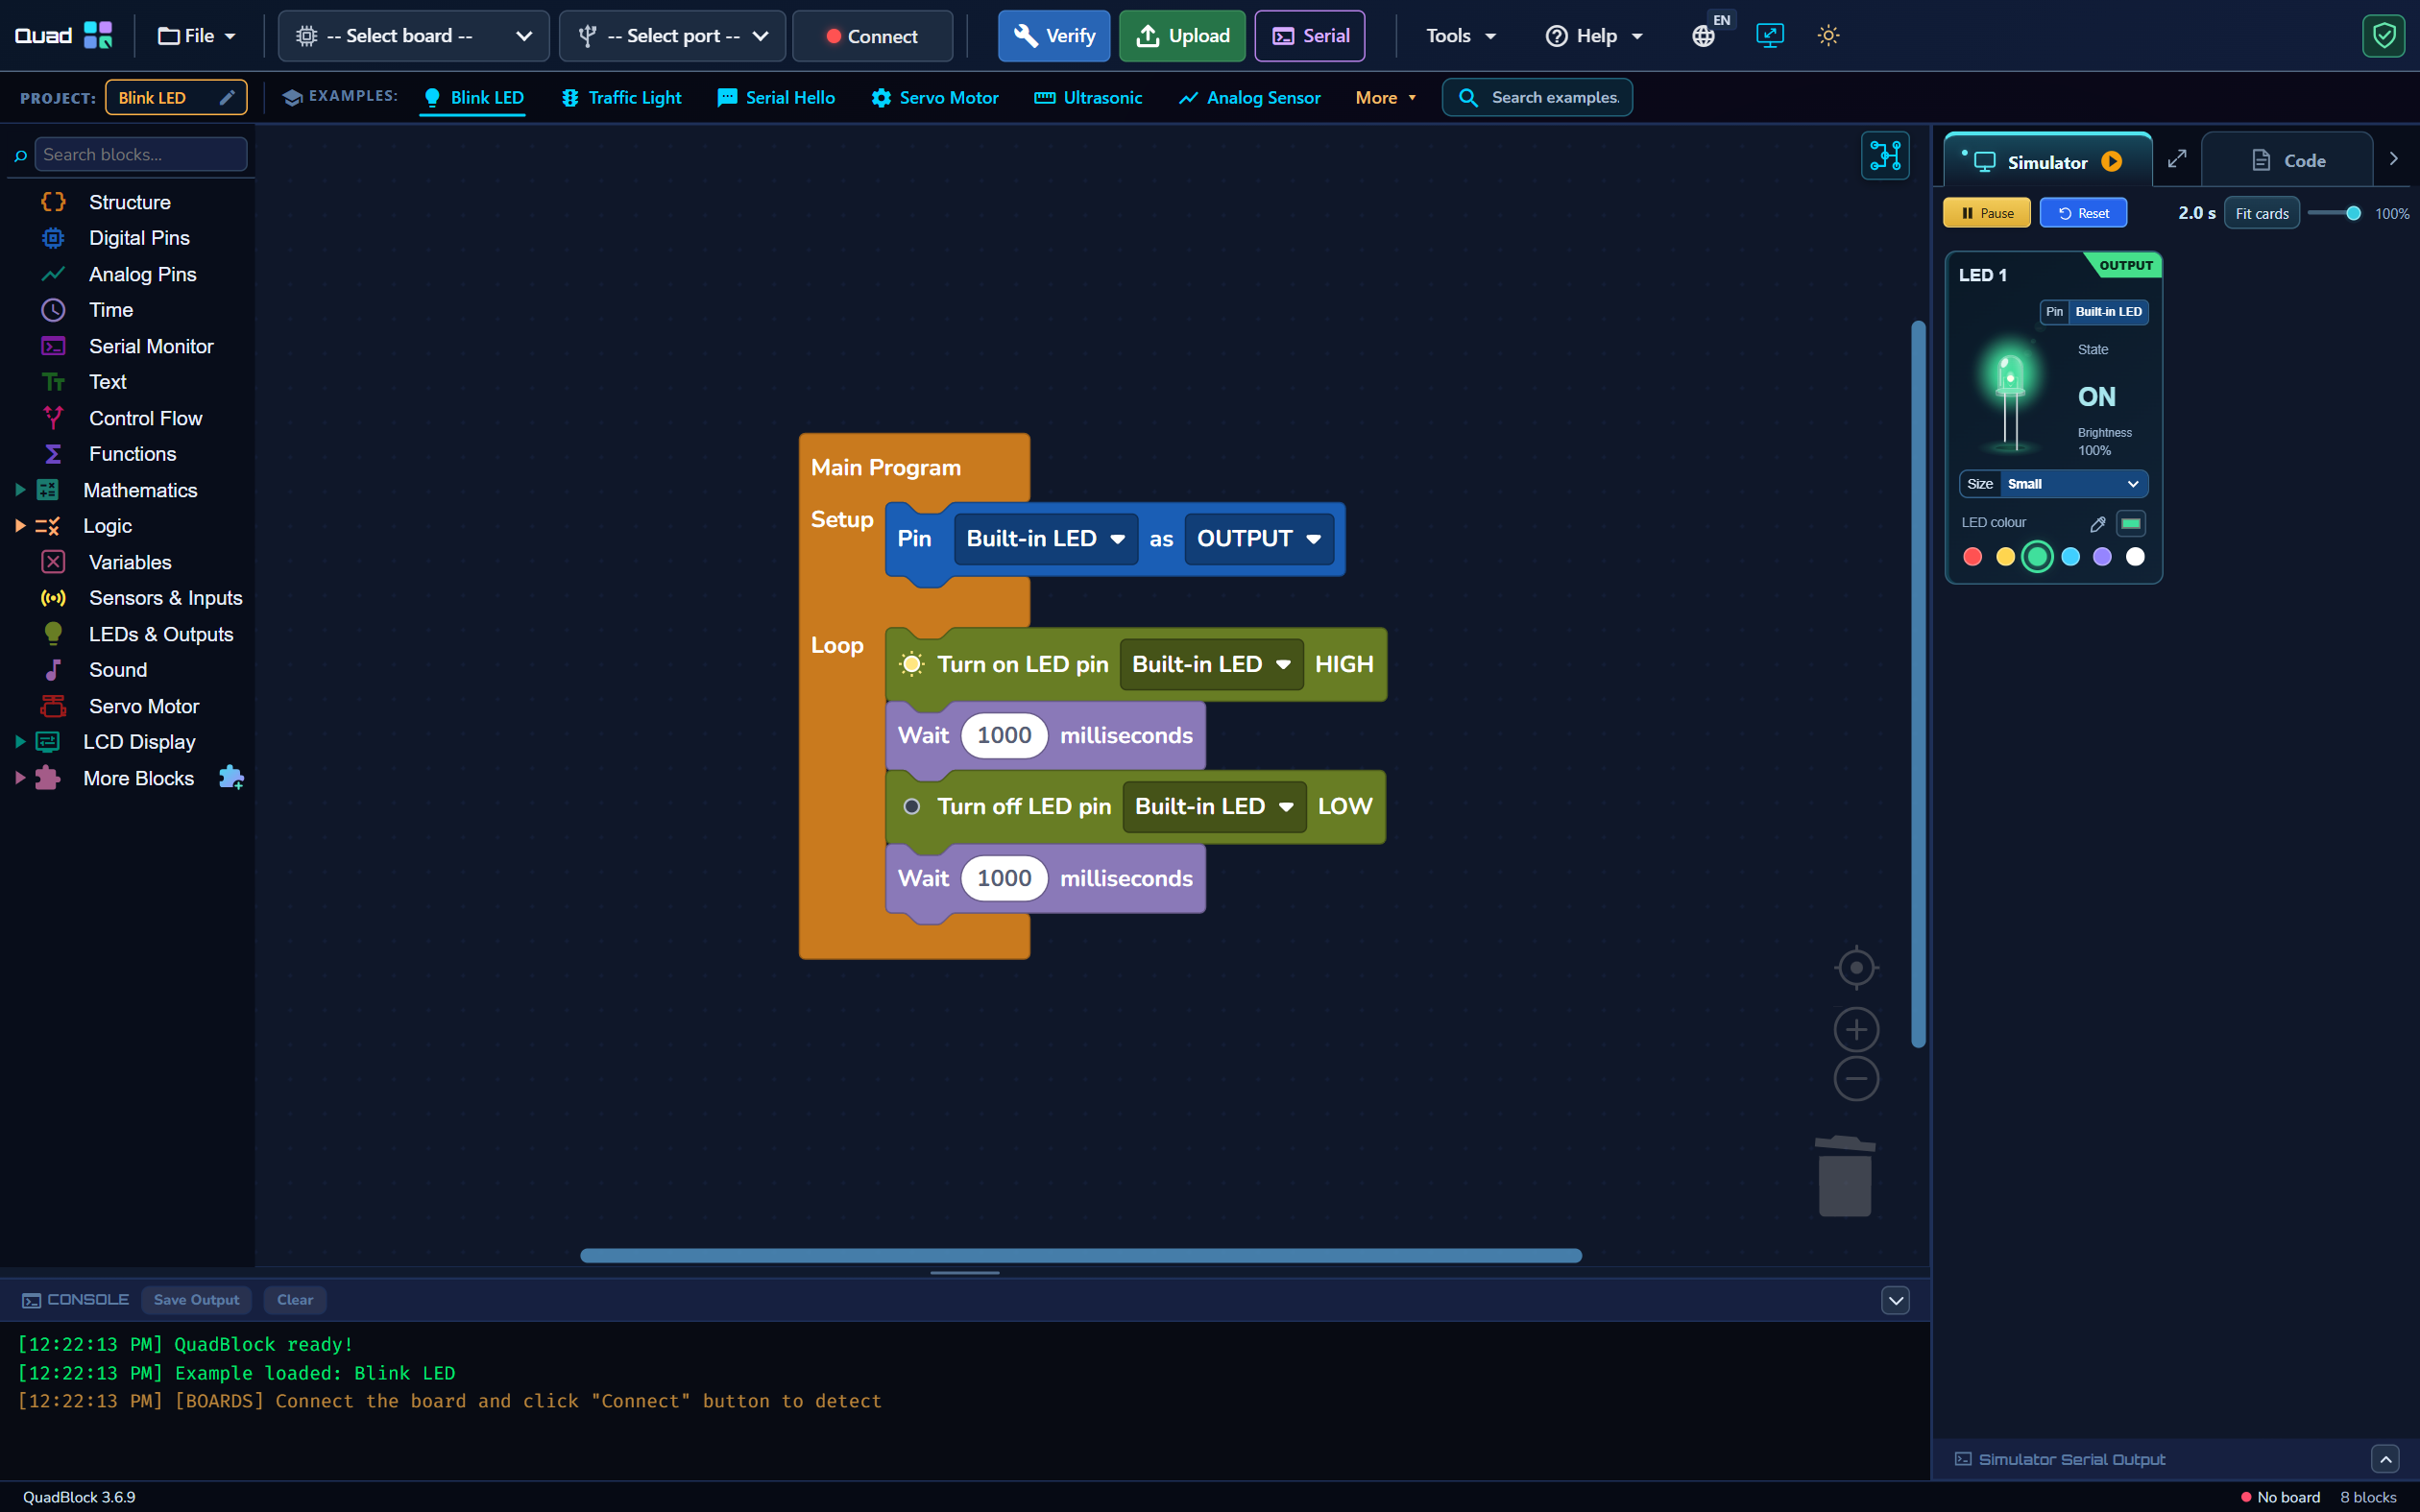
See your blocks turn into visible behavior
The QuadBlock simulator displays supported components found in your program as hardware cards. An LED changes state and brightness, a positional servo shows its angle, and supported displays show the values your program writes. The visual result makes a sequence or condition easier to understand than code alone. You can begin without connecting a physical board.
What the simulator is useful for
- Check the order of output commands and waits.
- Try supported virtual sensor values and see how conditions respond.
- Watch supported LED, motor, servo and display states.
- Read the simulator’s serial output while the program runs.
- Compare generated code with the visual logic you assembled.
The cards follow supported program blocks. Changing a virtual input is a way to explore your logic; it does not change a real sensor connected to the computer. Alternative component choices represent different visual modules for the supported input or output behavior. They do not automatically generate a new electrical driver circuit.
Build a small test before a large project
Follow the simulator testing tutorial with Blink LED. Then use an IF condition and a virtual analog input. Move the input below and above a threshold and confirm that the output changes on the intended side. For a sequence, check each state and wait rather than judging only the final image.
Pause lets you inspect the current result. Reset deliberately starts the run again. Switching to Code suspends an active run and returning to Simulator resumes it. A manually paused run should stay paused until you choose to continue.
Use the available space
Fit cards and the size slider help you inspect projects with multiple components. Docked view keeps your blocks nearby; expanded view gives the cards more room. Fit cards is a viewing aid, not a change to program timing or hardware values. The serial-output area can show printed values while you adjust virtual inputs.
Understand the limits before uploading
This is a visual simulator for supported block behavior, not a full electrical circuit, CPU instruction or radio simulator. It does not calculate component current, verify wiring, model every library or guarantee precise hardware timing. A simulated servo angle does not prove that a real mechanism can move safely. A virtual network state does not prove that a router will accept a real connection.
The simulator and a physical board run independently. Their LED blink phases can differ even when the underlying program is correct. After simulation, Verify the generated sketch and test the real circuit with suitable power and wiring. For board-specific guidance, read UNO R3 block coding or ESP32 block programming.
Questions before you start
Is this an Arduino UNO R3 simulator?
You can test supported block-program behavior for UNO R3 projects using virtual hardware cards. It is not an instruction-level emulation of the UNO R3 microcontroller or a general circuit simulator.
Can I simulate every Arduino or ESP32 library?
No. Simulation depends on supported blocks and component models. A library may compile for physical hardware without having a virtual model.
Do the cards use real hardware telemetry?
No. They show the virtual program state and supported inputs. Physical board output must be checked separately.