
What can you build with ESP32 blocks?
Block programming for ESP32 brings visual program building to GPIO, sensors, outputs and connected projects. In QuadBlock you can assemble supported instructions, inspect the generated Arduino-style C++ and upload through the ESP32 board toolchain. Start with a single LED output, then connect to Wi-Fi or add phone controls. ESP32 block coding uses the same control-flow ideas as other boards, but the hardware choices are different.
Select the exact ESP32 board
“ESP32” describes a family, not one interchangeable pinout. A classic ESP32 Dev Module and an ESP32-S3 can have different pins, USB behavior and peripheral support. Select the board that matches your device before building the program. Use its pinout to identify a suitable output and ground. Do not assume that a built-in LED exists or that it uses the same GPIO on every module.
Start with an external LED
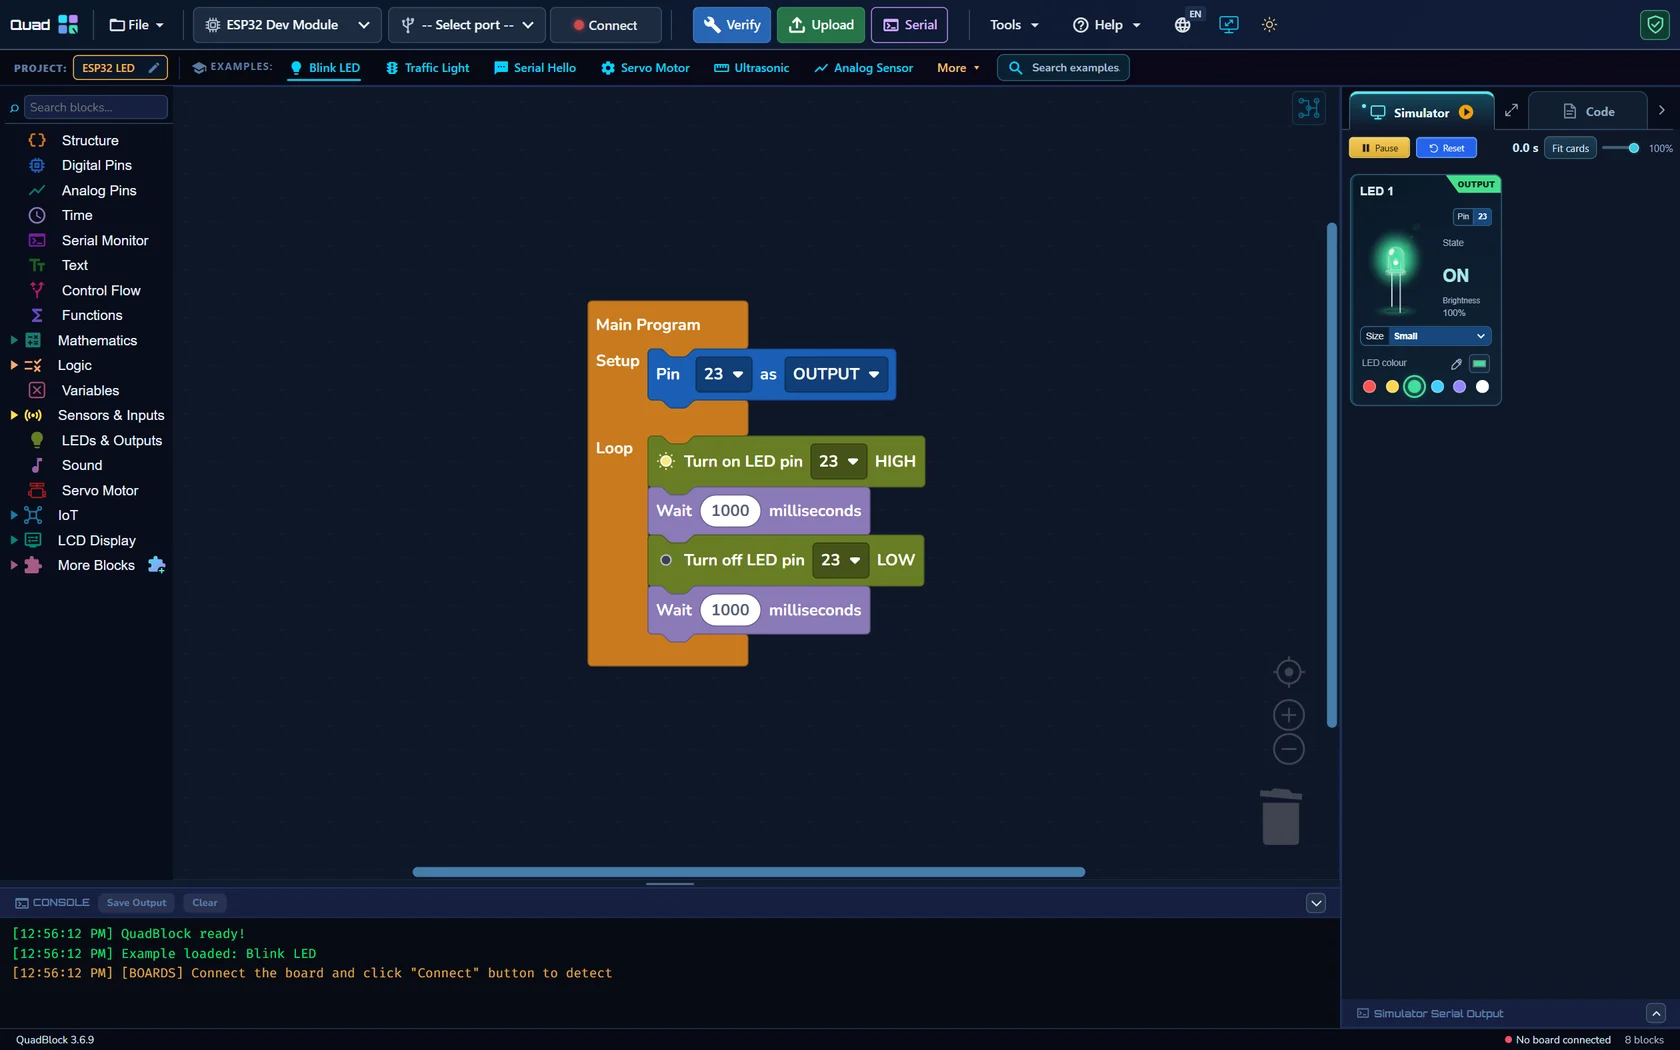
For a classic ESP32 Dev Module, GPIO 23 is a practical starting output when that pin is available on your board. Connect GPIO 23 through a 330 Ω series resistor to the LED anode, and connect the cathode to GND. Configure the pin as OUTPUT, set it HIGH, wait one second, set it LOW and wait again. Check the generated Code and upload to the selected board.
ESP32 GPIO uses 3.3 V logic. Do not apply 5 V to a GPIO. On the classic ESP32, GPIO 34–39 are input-only, so they cannot drive an LED. Other variants have different restrictions; use the selected board’s documentation.
Add Wi-Fi and phone controls
Connect the ESP32 to Wi-Fi with blocks using a compatible network, then print the assigned IP address. Once connected, build a local phone LED control page. Your phone and ESP32 must be on a network that allows them to communicate. A local control page is not automatically reachable from the public internet.
Keep credentials out of screenshots and shared project files. Use placeholders in examples, then enter your network details privately before uploading. A missing connection should lead to a clear failure path in your program, not an endless wait with no explanation.
Simulate the supported behavior
The simulator makes supported outputs and virtual readings visible while you develop the logic. It is not an ESP32 radio emulator, a complete circuit simulator or a guarantee of network connectivity on the physical board. Validate Wi-Fi, peripherals and power on actual hardware after the virtual logic check.
If upload fails, confirm the board package, USB cable and port. Some boards need a board-specific bootloader procedure; follow the module manufacturer’s instructions rather than assuming every ESP32 requires the same button sequence.
Reference: Espressif Arduino-ESP32 documentation.
Questions before you start
Can I use Arduino blocks with ESP32?
QuadBlock supports visual blocks for selected ESP32 boards and generates code for the selected toolchain. Arduino UNO-specific features must be replaced with ESP32-compatible operations.
Does the ESP32 simulator test my real Wi-Fi network?
No. Supported virtual behavior helps test program logic. Test actual wireless connection and phone access on the physical ESP32.