
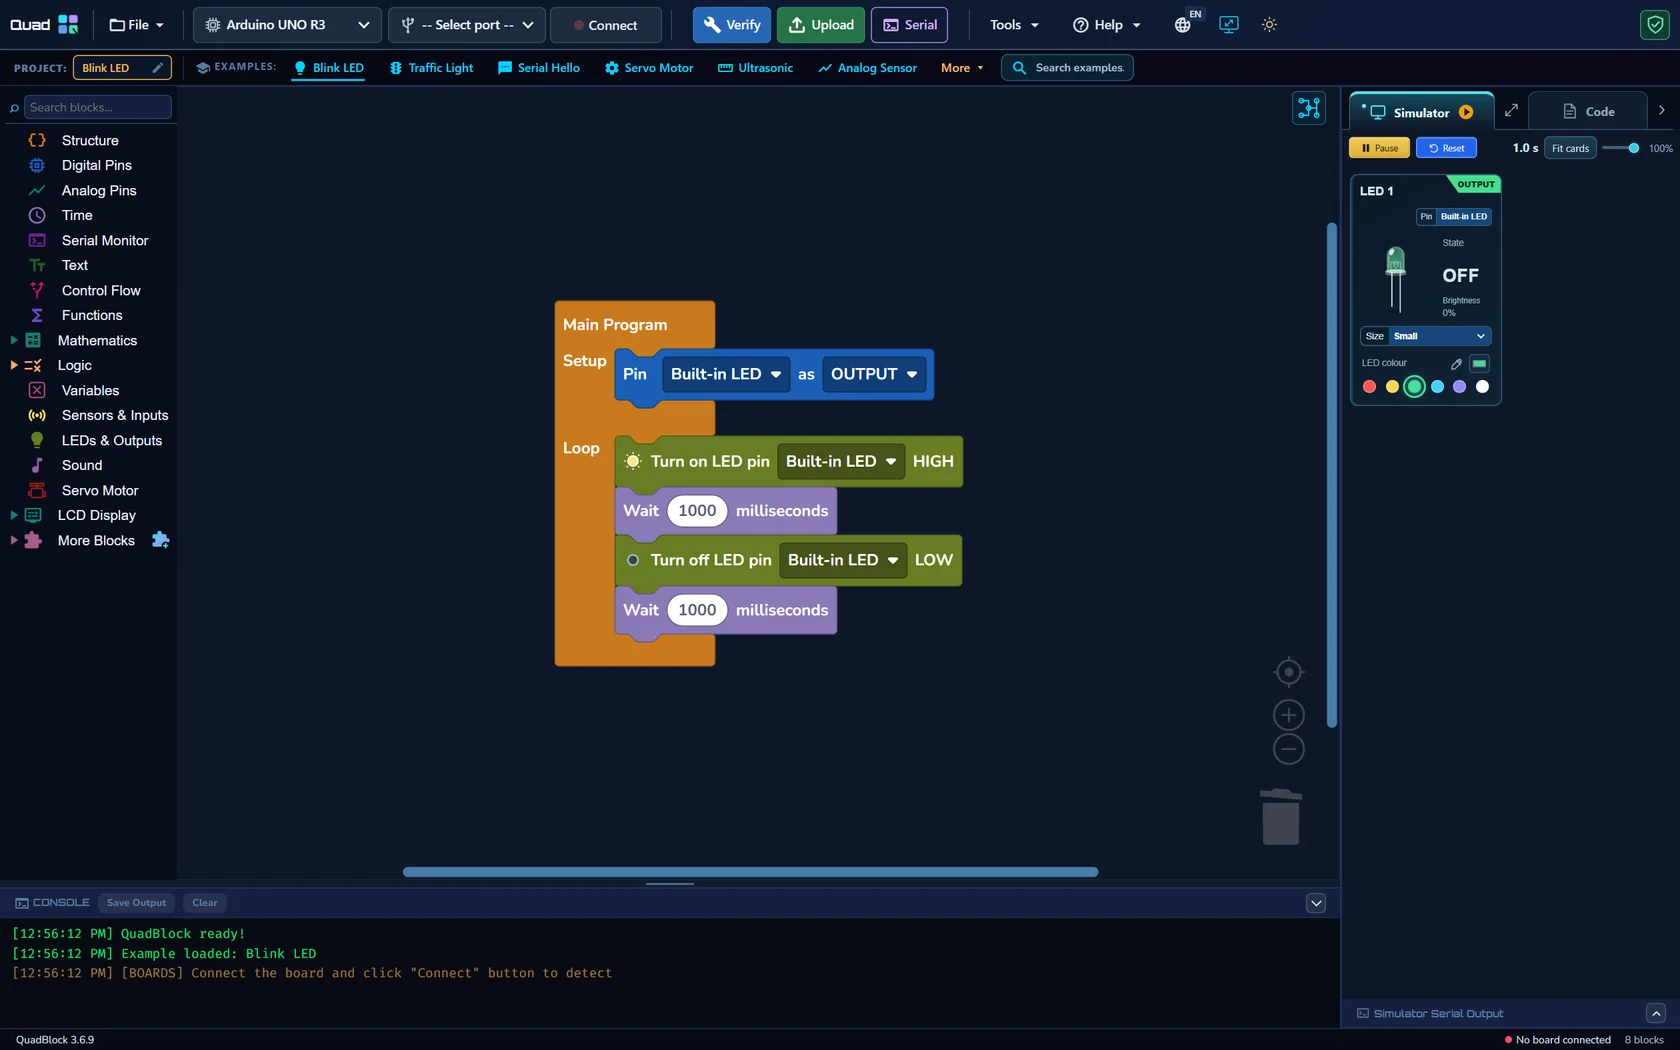
What is Arduino block programming?
Block programming lets you describe a program by connecting visual instructions instead of typing every line of code. Block coding for Arduino follows the same ideas as an Arduino sketch: configure hardware in Setup, then repeat your instructions in Loop. In QuadBlock, you can inspect the generated Arduino C++ as you build. The blocks are another way to write a program; they do not remove the need to understand pins, timing or wiring.
From your first LED to sensors and motors
Begin with an LED that turns on, waits, turns off and waits again. Then read an analog sensor, compare its value with a threshold and control an output. A loop, a condition and a changing value are enough to build many useful projects.
- Make an UNO R3 LED blink with blocks
- Read a potentiometer on A0
- Control a positional servo with an angle
Use the Text, Logic, Control Flow and Variables categories to develop your program gradually. Hexagonal reporter blocks return true or false for conditions. Numeric and text reporters provide values to other blocks.
Choose a board before choosing pins
QuadBlock includes board-aware options for Arduino UNO R3, UNO R4 Minima, UNO R4 WiFi, Nano R4 and supported ESP32 boards. They do not all have the same pins or features. UNO R3 is a straightforward place to start with digital input/output, analog readings and PWM. UNO R4 WiFi adds connected features and its built-in LED matrix. ESP32 projects use their own GPIO choices and 3.3 V logic.
Read the UNO R3 block-programming guide or explore block coding for ESP32. Use the board selector in the desktop app to match your actual hardware.
A simple visual-to-hardware workflow
- Select your board and connect the correct USB port.
- Build your Setup and Loop using the appropriate blocks.
- Open Code to inspect the generated sketch.
- Use the Simulator to test supported logic and virtual inputs.
- Click Verify to compile, then Upload to program the connected board.
Uploading still compiles the sketch and uses the installed board toolchain. Compilation speed depends on the project, board package and computer. Simulation runs separately from physical hardware; it is not live hardware telemetry.
Learn without hiding the important details
The simulator helps make state, brightness, sensor values and motor behavior visible. It is useful for checking whether a condition or sequence behaves as expected before trying the real circuit. It does not prove that a circuit is wired safely or that a motor has a suitable power supply.
See what the Arduino simulator can and cannot test. For a networked project, continue with connecting an ESP32 to Wi-Fi using blocks.
Questions before you start
Is block coding the same as Arduino C++?
It is a visual way to express program logic. QuadBlock generates Arduino C++ from supported blocks so you can inspect the relationship between the two.
Does an Arduino need to be connected to try the simulator?
You can explore supported virtual components without a connected board. A real board and the appropriate toolchain are needed for a physical upload.
Can I use the same project on every board?
Core logic may transfer, but pins, libraries, voltage levels and board-specific features must be checked for the selected board.